What should be done to clear the shadows of the face?
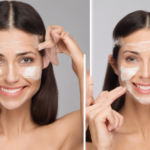
What should be done to clear the shadows of the face? Addressing facial shadows requires a targeted approach. Whether caused by uneven skin tone, under-eye circles, or facial contours, these shadows impact appearance and confidence. Effective solutions include customized skincare routines, strategic makeup application. And mindfulness techniques are included. To reduce shadows and enhance natural glow.
Techniques to Remove Shadows
Using Dodge Tool
One effective method to lighten shadows on the face is using the Dodge Tool. This tool is particularly useful for targeting dark areas without altering the rest of the image. To start, duplicate the background layer of your image. Then, select the Dodge Tool, set it to target shadows, and adjust the exposure to around 20%. Using a brush with a soft edge, gently paint over the shadowed areas to brighten them. It’s beneficial to experiment with different brush sizes and exposure levels to achieve the most natural look 123.
Using Clone Tool
The Clone Tool offers another robust solution for removing shadows. Begin by adding a new layer above your background copy. Ensure the ‘Use All Layers’ option is selected in the clone tool settings. This allows the tool to sample from all layers, making cloning more seamless. Use the Clone Tool on this new layer, adjusting the opacity as needed to blend the edits naturally with the rest of the image. This method is particularly effective for larger shadowed areas that need substantial correction 123.
Using Spot Healing Brush
For smaller, more precise corrections, the Spot Healing Brush Tool is ideal. This tool works wonders on minor shadowed spots by blending them with surrounding textures. To use it, simply select the Spot Healing Brush, choose a suitable brush size, and click on the shadowed areas you wish to correct. This tool is especially handy for quick fixes and works best when the shadowed areas are not overly large or complex 12.
Step-by-Step Guide for Removing Shadows
Duplication of Background Layer To begin the process of removing shadows, one must first duplicate the background layer. This is crucial as it allows edits to be made without altering the original image. In Photoshop, they can select the background layer and choose ‘Layer › Duplicate Layer’ from the top menu bar 2.
Application of Tools After duplicating the layer, they should use the Patch tool to target the shadowed area. By dragging a selection around the shadow, they can then click inside this selection and drag it to an area of the background that closely matches the texture they wish to replicate. This helps in effectively removing the shadow while maintaining the natural look of the surrounding area 2.
Setting Parameters and Brushes Once the shadowed area is selected and adjusted, they can use the Dodge tool to brighten up the dark spots. This tool should be used with care to ensure that the lightening of shadows looks natural. They should adjust the exposure settings and choose a soft-edged brush to gently apply the effect over the shadowed areas 2.
By following these steps, they can effectively remove unwanted shadows from their images, enhancing the overall quality and appeal.
Advanced Tips and Troubleshooting
Feathering Selections
Feathering is a crucial technique for smoothing the hard edges of a selection, making a newly added element blend seamlessly with the rest of the image. They can apply feathering by selecting the area they want to edit and then adjusting the feather settings to create a gradual fade between the colors of the edge pixels and the surrounding pixels. This can be done by going to Select › Modify › Feather or pressing Shift+F6 and entering a value between 0 and 100 pixels to determine the intensity of the feather effect 4.
Using Adjustment Layers
For more controlled and non-destructive editing, they should consider using adjustment layers. This approach allows them to make changes such as lightening shadows or adjusting midtone contrasts without permanently altering the original image. They can create a new adjustment layer for levels or curves by choosing Layer > New Adjustment Layer > Levels. This enables them to adjust the brightness of the image’s middle tones or correct color casts without affecting the shadow and highlight values. Adjustment layers also offer the flexibility to modify the intensity of the adjustments by changing the layer’s opacity 5.
Blending Edges
Blending edges effectively can prevent harsh transitions and help achieve a more natural look. After applying adjustments, they should focus on the blending of the edges where the brightened areas meet the rest of the image. This can be accomplished by selecting the adjustment layer’s mask and using tools like the Blur tool or applying a Gaussian Blur filter with a radius of about 3 to 5 pixels to soften the transition. Additionally, if the brightness increase is too strong, they can adjust the opacity of the adjustment layer to fine-tune the effect and ensure that the faces appear natural and not overly processed 6.
Conclusion
To banish the shadows from one’s face, embrace self-acceptance and authenticity. Let inner light illuminate outward, dispelling doubt and insecurity.Embrace weakness because it reveals true strength. Embrace diversity in beauty. Because it enriches our world. Kindness and compassion shone in our eyes. Erase the shadows with understanding and acceptance.
FAQs
1. How can shadows be eliminated from facial images?
Shadows can be removed from photographs using photo editing applications such as PhotoDirector or Snapseed. These applications provide tools like the healing brush, which can be used to eliminate unwanted shadows, enhancing the overall appearance of the image.
2. What methods can reduce shadow effects in photography?
To minimize shadow effects, it is advisable to use continuous light lamps when capturing images. These lamps allow full control over lighting conditions before taking the photo, making it easier to manage and correct shadows by simply adjusting the light source.
3. How can I adjust shadows on my iPhone to improve facial images?
To adjust shadows in photos on your iPhone, open the Photos app and select the photo or video you wish to edit. Tap “Edit,” and then swipe left under the photo to access editable effects such as Exposure, Brilliance, Highlights, and Shadows. Choose the desired effect and use the slider to make precise adjustments.
4. Which photo editors are recommended for removing shadows from faces?
Several top photo editing tools are recommended for removing shadows from faces, including Spyne, Snapseed, Photoshop Fix, and TouchRetouch. These tools offer various features like real-time processing, healing tools, layer-based editing, and clone tools, enabling users to achieve detailed and impeccable results.